
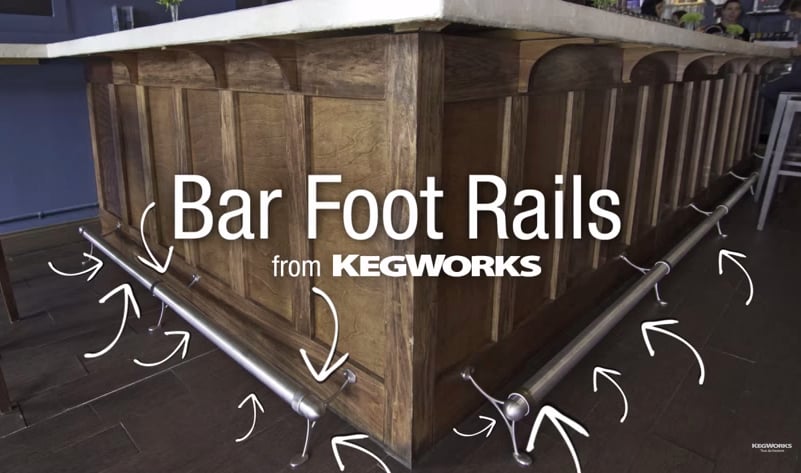
There is nothing like pulling a stool up to a well-designed and well-built bar. Few accessories can take your bar to the level of authenticity and comfort that bar foot rails can. Whether you’re building a home bar or a commercial establishment, foot rails add a touch of class that make an ordinary bar extraordinary and with KegWorks, they’re easy to order and install.
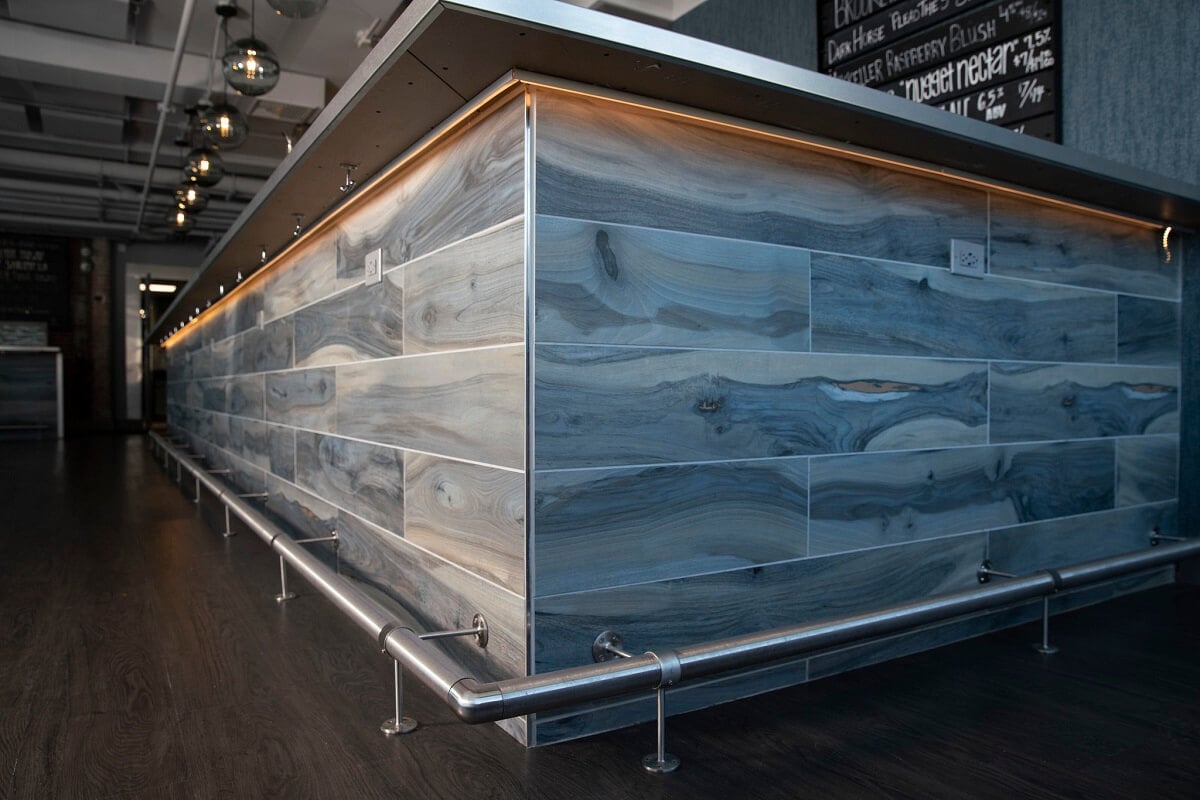
Table of Contents
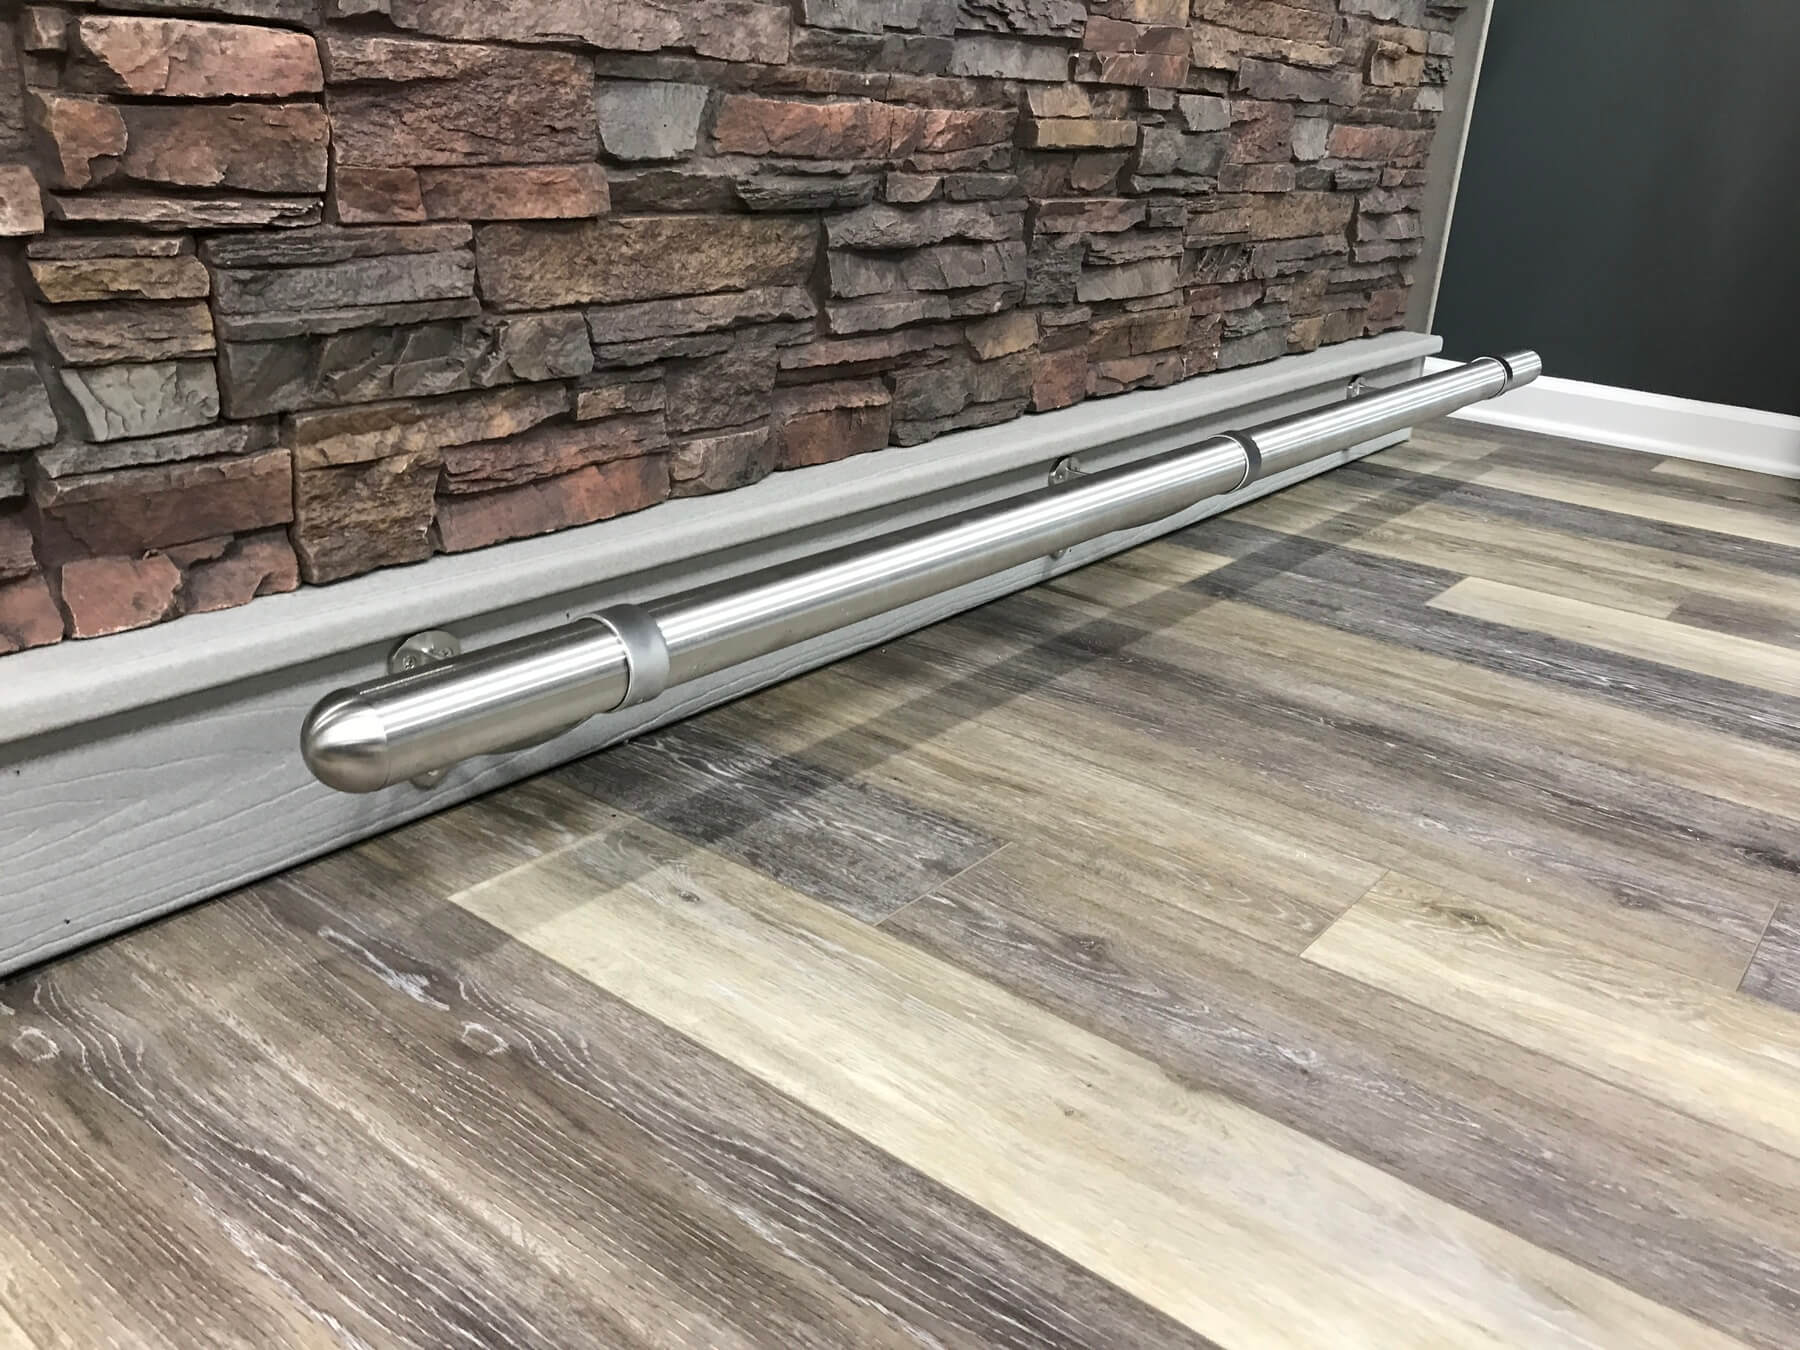
Bar Foot Rail Components
All bar foot rail projects will require three main components (tubing, brackets & end caps). Some installations may require as many as six components to complete the bar foot rail system. The size and shape of your bar will dictate the components you need:
Required Components
- Tubing: The bones of your foot rail project, tubing is the metal rail that serves as your foot rest. It is available in brass, stainless steel and wood with a variety of finishes to choose from. Foot rail tubing is available in 2’, 4’, 6’ and 8’ sections that can be cut down to match the specs of your project. We also offer custom bending to roll precise foot rails for structures of any size or shape.
- Brackets: Bar foot rail brackets connect your tubing to your bar and/or the floor. There are a variety of options to match the look and setup you’re trying to achieve. KegWorks also offers custom brackets for unique installations. Custom brackets are fabricated to meet your project’s specifications and then have the finish of your choosing applied to them.
- End caps: End caps attach to the end of foot rail tubing to provide a finished look to your project.
Pro Tip: Bar Foot Rail Kits come with everything you need if you’re planning a straight run of foot rail. Kits come in 6’ & 8’ lengths and include the required tubing, brackets and end caps.
Optional Components
- Elbows: Elbows are used to connect foot rail sections at a corner joint. Available in 90-degree and 45/135-degree angles as well as adjustable fittings.
- Splicing sleeves: Splicing sleeves go on the inside of your bar rail tubing to connect two pieces when you need longer than 8-feet of bar rail to fit your bar’s dimensions.
- Wall flanges: Wall flanges are needed when the end of the foot rail tubing meets a wall or any other flat surface.
Additional Bar Rail Touches for Your Bar
- Bar rail molding: Wooden arm rests, commonly known as Chicago bar rail or bar rail molding, add comfort, style and functionality to your bar. It provides a finished look to your bar top as well as adding additional comfort. Bar rail molding can also keep glassware and spills from falling off the bar top and on to the floor. Wooden arm rests are available in four different types of wood and you can apply stain to match your project’s design.
- Handrails: Handrails are very similar to bar foot rails and they are available in several finishes. Just like foot rails, metal arm rests have three main components: tubing, brackets and end caps. The handrail extends the length of the bar and gives people something to lean on.
- Service bar rail: A perfect addition for any commercial bar project, service bar rail clears a space along your bar for servers to place and pick up drink orders without interference from patrons. It mounts easily to your bar, and is available in finishes to match your project.
- Drink Rail: Drink rails attach to the interior of your bar and provide an area for servers to prepare drinks without having to worry about spills collecting on the bar top. They are mainly constructed from stainless steel and can even have a drain installed to dispel spilled liquids. This is a must have for commercial establishments, and is even a nice add on for home bars.
How To Order Bar Foot Rail
Planning is important to ensure that you purchase the correct components needed for your foot rail. Remember that you will need at least three main components: tubing, brackets and end caps. You may also need splicing sleeves, elbows or wall flanges depending on your bar’s layout.
Here are simple steps to take before you order, to ensure that you get exactly what you will need for the perfect foot rail system.
Step 1: Determine how much bar rail tubing you will need
You should measure very carefully before ordering tubing for your foot rail project. First, make a simple sketch by measuring each side of the bar that will have foot rail.
It’s helpful to make a virtual rail on the floor around your bar, with string or painters’ tape; doing this will help you to visualize how much space you’ll need for your foot rail.
Once you have laid out your design on the floor, measure each section to calculate how much tubing you will need. Tubing is sold in lengths of 2’, 4’, 6’ and 8’. If your bar is longer than 8’, you will have to join two pieces of tubing together to make a rail that fits your bar. Connecting the pieces is easy with a splicing sleeve, an internal connector that you insert into the end of each tube.
Pro Tip: Keep your sections of tubing symmetrical when splicing together for stronger support and better aesthetic appeal.
Measuring for corners
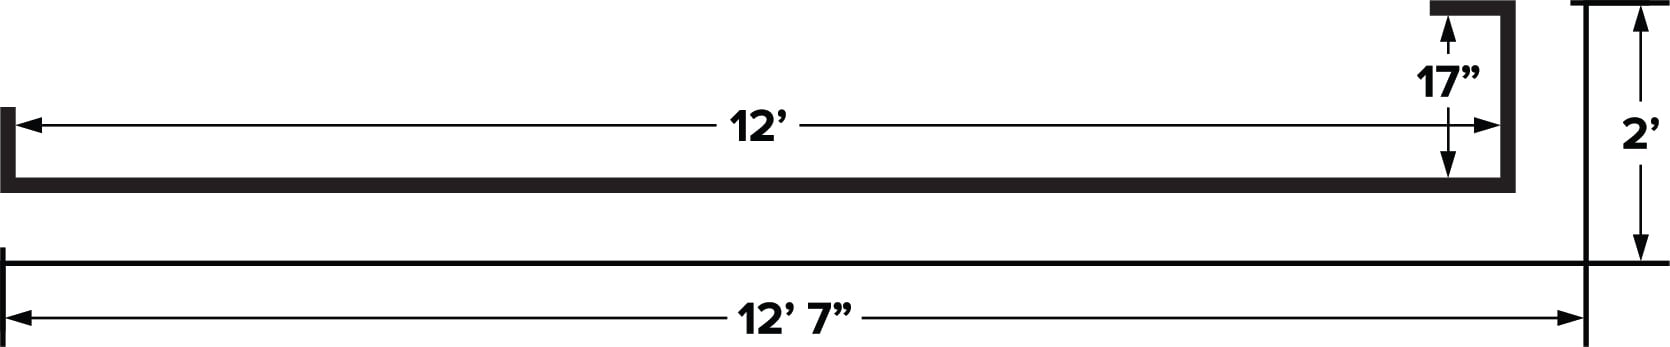
If your foot rail plans include turning a corner, you must factor in brackets and elbow fittings. To accurately measure foot rail tubing that will turn a corner, add the depth of the bracket, minus the dimensions of the elbow you will be using. For example, if you select a bracket that holds the rail 6-inches from the face of the bar, that bracket will add nearly 6-inches to the overall length of rail you will need. (6’ section of bar + 6” bracket depth - 3” elbow fitting size = 6’ 3” section of tubing needed)
Round up your measurement
When ordering tubing, it’s always wise to round up to the nearest foot. If your bar is not a full foot increment (i.e. 6′, 7′), but rather has some inch increment (i.e. 6’2″, 7’2″) you will need to order up to the next foot. So if your bar is 3’2″ you will need to order a 4-foot piece of tubing, if your bar is 7’2″ you will need to order an 8-foot piece of tubing, and so on. When installing your tubing you will need to cut the rail with a saw. It’s much easier (and cheaper) to cut off excess tubing than it is to connect more.
Step 2: Determine How Many Brackets You’ll Need
To support your foot rail you’ll need to install brackets that hold the tubing in place. To make sure your foot rail has the right amount of support you’ll need a bracket 2-6 inches from the end of your tubing or elbow and an additional bracket for every 3-4 feet of tubing to ensure that your foot rail is nice and sturdy. For example, if you have 8 feet of tubing, you’ll need one bracket on each end and one in the center, for a total of three brackets.
Choosing your bracket style
Now is a good time to make sure that your bar face and floor surface are able to support the brackets you want for your project. Combination brackets are the most popular option because they are relatively easy to install. A combo bracket is attached to the face of the bar with the foot of the bracket resting on the floor for support.
For those that want to use bar mounted brackets, then make sure you can access the back of the die face to properly secure it. To ensure adequate support you may need to add depth to the face of your bar to support the weight of the rear bolt. It requires a solid backing at least ¾” deep.
Floor mounted brackets as well as rounded center post brackets (both standard and tall) give you the option to install bar foot rail without having to screw hardware into the face of the bar. Just be sure that you can safely drill into the surface under the bracket to properly secure it.
Bracket Styles:
- Bar mount brackets
- Combination brackets
- Floor mount brackets
- 90-degree brackets
- Center post brackets
- Rounded center post brackets
- Tall rounded center post brackets
Consult our Bar Foot Rail Brackets Guide to learn about the look, height, and function of the many bracket styles we offer. Select brackets that best complement the look and feel of your bar. Most customers will order brackets in a finish that matches their bar rail, but you can also choose a contrasting finish to add a unique touch to your project.
Step 3: Determine Which Additional Components You Will Need
Once you have the layout for your bar rail sketched out and determined how much tubing you will need, you should jot down the quantity and style of any other components you will need to complete your project.
A detailed list of how many brackets, splicing sleeves, end caps, flanges and/or elbows you’ll need for your project, including size, style and/or finish will be a huge help when ordering.
End Caps & Flanges
For a standard bar rail install you will need two end caps, one to cover each end of the tubing. You can choose from either domed, flush or decorative end caps depending on your taste or project specs.
If you’re looking to use metal end caps with a wooden rail, just make sure to select end caps that are marked as “external fittings”. External fittings are components that fit around the outer diameter of the tubing, and since wooden rails are solid, your end caps need to fit around the wood.
If your bar area butts up to an adjacent wall, you can use wall flanges instead of end caps to secure the ends of your foot rail.
Elbows
For bar areas that are L-shape or have multiple corners, you will need elbow fittings to wrap the bar rail around a corner and connect the separate runs of tubing. You can choose from either 90 or 45/135-degree angle fittings or adjustable elbow fittings depending on the layout of your bar.
Step 4: Select the finish that you would like to use
This is the most fun step. Choose a finish you like based on its look, as well as one that you are willing to perform the required amount of maintenance on. Some finishes are easier to maintain than others. Check out our Bar Rail Maintenance Guide to learn more about caring for the different finishes we offer.
Bar Rail Finishes
If you are planning on installing your bar foot rail outdoors, then choose a finish that is designed to withstand the elements. You can also choose to have our other finishes protected by a clear coat to protect it. This will allow you to maintain your bar rail’s shine over time even if it is used for an outdoor bar.
In addition to our standard finish options, we also offer custom finishes. Just provide us with a sample of your desired finish or color and we can powdercoat all of your tubing and components to match.
Example Bar Foot Rail Layouts
Based on the steps outlined above, let’s take a look at a few common examples of what you’d need for installing foot rail on different bar layouts.
6’ Bar Foot Rail - Straight Bar
- (1) 6-foot bar rail tube
- (3) brackets
- (2) end caps
10’ Bar Foot Rail - Straight Bar
- (3) 4-foot bar rail tubes (two tubes will be cut down to 3’)
- (2) splicing sleeves
- (4) brackets
- (2) end caps
12’ Bar Foot Rail - Straight Bar
- (2) 6-foot bar rail tubes
- (1) splicing sleeve
- (5) brackets
- (2) end caps
10’ x 4’ Bar Foot Rail - L-shaped Bar
- (4) 4-foot bar rail tubes (two tubes will be cut down to 3’)
- (2) - splicing sleeves
- (6) - brackets
- (1) - elbow fitting
- (2) - end caps
4’ x 10 x 4’ Bar Foot Rail - U-shaped Bar
- (5) 4-foot bar rail tubes (two tubes will be cut down to 3’)
- (2) splicing sleeves
- (8) brackets
- (2) elbow fittings
- (2) end caps
How To Install Bar Foot Rail
Tools Needed For Installing Bar Foot Rail
- Electric Drill/Electric Screwdriver
- Saw - See instructions for type of saw needed for tubing material
- Phillips Screwdriver
- Metal file - For smoothing out cut tubing edges
- Channel Lock Pliers
- Adhesive for elbows and end caps

Pro Tip: When installing bar foot rails, preparation is key. A little bit of prep will eliminate waste and/or mistakes. Protect your tubing from scratches and dings during installation. If your tubing arrives wrapped in a layer of plastic film, try to keep this covering in place as long as possible to help protect it.
Step 1: Cutting Tubing (optional)
You may have to make adjustments to the length of the tubing that you purchase, to make it the perfect size for your bar. It is necessary for you to make those adjustments before assembling your system. To do this, first, measure and mark where you will need to cut your tubing. When determining tube cut lengths, keep in mind that the splicing joints should be hidden within a bracket. Keep your sections of tubing symmetrical when splicing together for stronger support and better aesthetic appeal. Make sure that you double-check all of your measurements before you cut.
Cutting Brass Tubing:
- You can use either a hacksaw or a powered radial arm saw to cut brass tubing.
- It is very important that your cuts be square to the length of the tube.
- If you are using a hacksaw, use a miter box to be sure your cuts are straight.
- If you are using a powered radial saw arm, use a fine-toothed blade or an abrasive wheel.
- After cutting the rail, file it to smooth the edge.
Cutting Stainless Steel Tubing:
- Stainless steel is a harder alloy than brass so for stainless steel tubing you’ll want to use a powered radial arm saw with a carbide tip blade.
- It is very important that your cuts be square to the length of the tube.
- After cutting the rail, file it to smooth the edge.
Step 2: Loosely Assemble Foot Rail
Once your tubing is the ideal length, loosely assemble the foot rail by applying a water-based lubricant and sliding the tubing through the brackets. It’s important to do this before splicing so you don't have to slide brackets down a long length of tubing.
Pro tip: Make sure the openings of your brackets are clean and smooth to avoid scratches when sliding them into place.
Don’t get too excited and get ahead of yourself, you don’t want to attach tubing to the brackets with set screws, or attach the brackets to the wall just yet.
Step 3: Splice Tubes Together (optional)
To join two pieces of tubing together, you will need to insert internal connectors called splicing sleeves. They are metal pieces that are inserted into the end of each tube. To insert a splice into a tube, compress the splice with a pair of channel lock pliers and push the splice into the end of the first piece of tubing. Then, do the same with the other end of the splice and insert it into the second piece of tubing that you want to connect.
A best practice is to place your brackets where tubes are spliced together. This provides added stability and strength to your foot rail. This also provides for a neater look where the joints are concealed by your bracket.
Step 4: Mark Where Your Brackets Will Go
Use a pencil to mark where your brackets will go on the bar face. You’ll need a bracket 2-6 inches from the end of your tubing or elbow and an additional bracket for every 3-4 feet thereafter to ensure a level and stable foot rail. For example, if you are installing an 8’ run of bar rail, you’ll need one bracket on each end and one in the center, for a total of three brackets.
To hold the screws in place, the bracket requires a solid backing at least 3/4-inch deep. Now is a good time to double check that your bar is able to support the brackets (if you didn’t check when you originally ordered them).
If you are using a wall to secure your bracket, it is ideal to find a wall stud for mounting. If it isn’t possible to use studs, you can use a wall anchor instead, however it is important to determine the correct size and type that you need.
Should you require wall anchors, we suggest a trip to your local hardware store. Wall anchors come in a variety of sizes and types. The professionals at the hardware store should be able to answer any questions that you might have regarding the best wall anchor for your job.
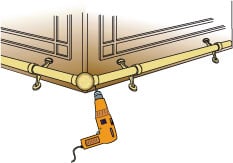
Step 5: Install & Secure Brackets
Once you are comfortable with the placement of your brackets and rails, you’re ready to attach them to your bar or wall. Start by pre-drilling all the holes in your bar and floor (if applicable).
Once all of your pilot holes are drilled, attach the brackets to the wall and floor with mounting screws along the first straight section of your bar, leaving a little wiggle room to adjust as you go. Once all the mounting screws are in place, tighten them to ensure your bar foot rail is properly secure.
Pro Tip: If you’re using a wall flange in place of a support bracket, make sure to slide the flange onto the tube before securing that section of foot rail to the bar. Remember that you can only replace a support bracket with a flange if the flange is mounted to a solid backing.
Step 6: Secure Tubing To Brackets
Secure the loose tubing to the brackets with set screws. We’re all about convenience here at KegWorks, so when you buy foot rail components from us, the set screws that come with them are self-drilling/self-tapping. For added convenience you may want to pre-drill any necessary holes for set screws before mounting brackets to bar depending on the amount of room you have to work with.
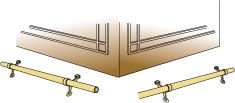
Step 7: Install Elbows
If you're installing your rail around a corner, you'll need to securely attach the elbow to the installed foot rail first. Then, attach the second loosely assembled foot rail section to the elbow.

Step 8: Attach End Caps
Bar foot rail end caps are designed to fit loosely to allow room for error during the manufacturing process. Simply slide your end cap into the end of the tubing to attach it. We recommend coating the inside of the end of your tubing with an adhesive, such as Loctite Red or JB Weld SuperWeld, before inserting the end caps for a permanent bond. You can also wrap the stem of the end cap with masking tape or electrical tape several times before sliding it into the tubing for a snug fit.
And there you have it! Your bar now has a classy and comfortable foot rail installed for you to enjoy. Now, take a step back, pour yourself a drink, and admire your handiwork!
Maintaining Your Bar Foot Rail
There are different ways to care and clean your foot rail depending on the type of metal and finish. Using improper cleaning methods or products may damage the finish of your foot rail. To keep your bar rail looking as good as it did when first installed, read our cleaning and maintaining bar rail for proper cleaning techniques for every type of bar rail finish.

KegWorks
KegWorks has been selling cool tools for drinking and serving knowledge on tap since 1998. We are all about enjoying good drinks with good friends.
Leave a Comment